

The Process of Creating a Linux Virtual Machine on azure is quite different from Creating a Windows Virtual Machine (just few similarities) as well as the connecting path and process. Creating and connecting can be rigorous at times however, i have stated detailed step by step process on how to create and connect to a Linux Virtual Machine on Azure with ease.
To create a Linux Virtual Machine on Microsoft Azure, you must first have an Azure Subscription. Click here to create a Microsoft Azure account if you don't have one.
Kindly follow the Steps below to Create your Linux Virtual Machine.
SIGN IN TO YOUR AZURE PORTAL: Sign into Azure Portal with your Email and Password
TYPE "Virtual Machine" in the search bar and Select "Virtual Machine" from the list of resources that showed up

Click on the "Create" button
From the dropdown menu select the Virtual Machine as highlighted in the picture below

The "Basic" Page will open
PROJECT DETAILS
Under the Project detail section, we have Subscription and Resource group.
Subscription: this simply means a membership mode that grants you access to or enables you use Microsoft Azure services & tools according to the subscription plan. Microsoft Azure subscription is similar to some digital subscription patterns and plans e.g Your Internet Service Provider Subscription Plans. Subscribing to Azure will enable you obtain access to various services and resources that is available under Azure, however the degree to which you can use these services and resources depends on your subscription plan. Azure also offers a free/ trial period one month, giving you an ample opportunity to explore and utilize some resource in the Azure Cloud environment. *On a free/trial subscription, the Subscription is set to "Azure Subscription 1" by default
Resource Group: this is like a container or vessel that holds similar or related resources like Virtual Machine and databases in Azure Cloud Environment. For example in a Library where you have alot of different types of books kept in different shelves, you might want to arrange and keep related books in separate shelves according to the type or subject of the Book e.g Science, Psychology, and Business. In this case, the library represents your Azure Cloud Environment, The Shelves represents the Resource group, and the resources are the books.
- You will have to click on "Create New" and give your resource group a name if you don't have any existing resource group.

INSTANCE DETAILS
Under instance section, You will have to;
Give your Virtual Machine a name
Under Region, click on the dropdown icon and select from the list the desired region you would like your Virtual Machine to be.
Region refers to a specific geographical location where physical data centers that host infrastructure and services are situated. All regions operate independently and is configured to be self-contained with its own set of resources and infrastructure.
In Microsoft Azure, a region can consist of three availability zones, Known as Zone 1, Zone 2, and Zone 3. Each Zone has one or more data centers that are kilometers away from each other.
The various data centers are with independent Power, networking, configuration and cooling infrastructure to avoid and minimize the impact of failures and disruptions. Fiber optic technology allows onward high-speed data transmission over long distances while maintaining low latency and high bandwidth capabilities. The Fibre Optic Cable physically links this data centers.
Under Availability Option, click on the dropdown icon and select Availability Zone
Under Availability Zone, click on the dropdown icon and select the Zone you would like your Virtual Machine to be.

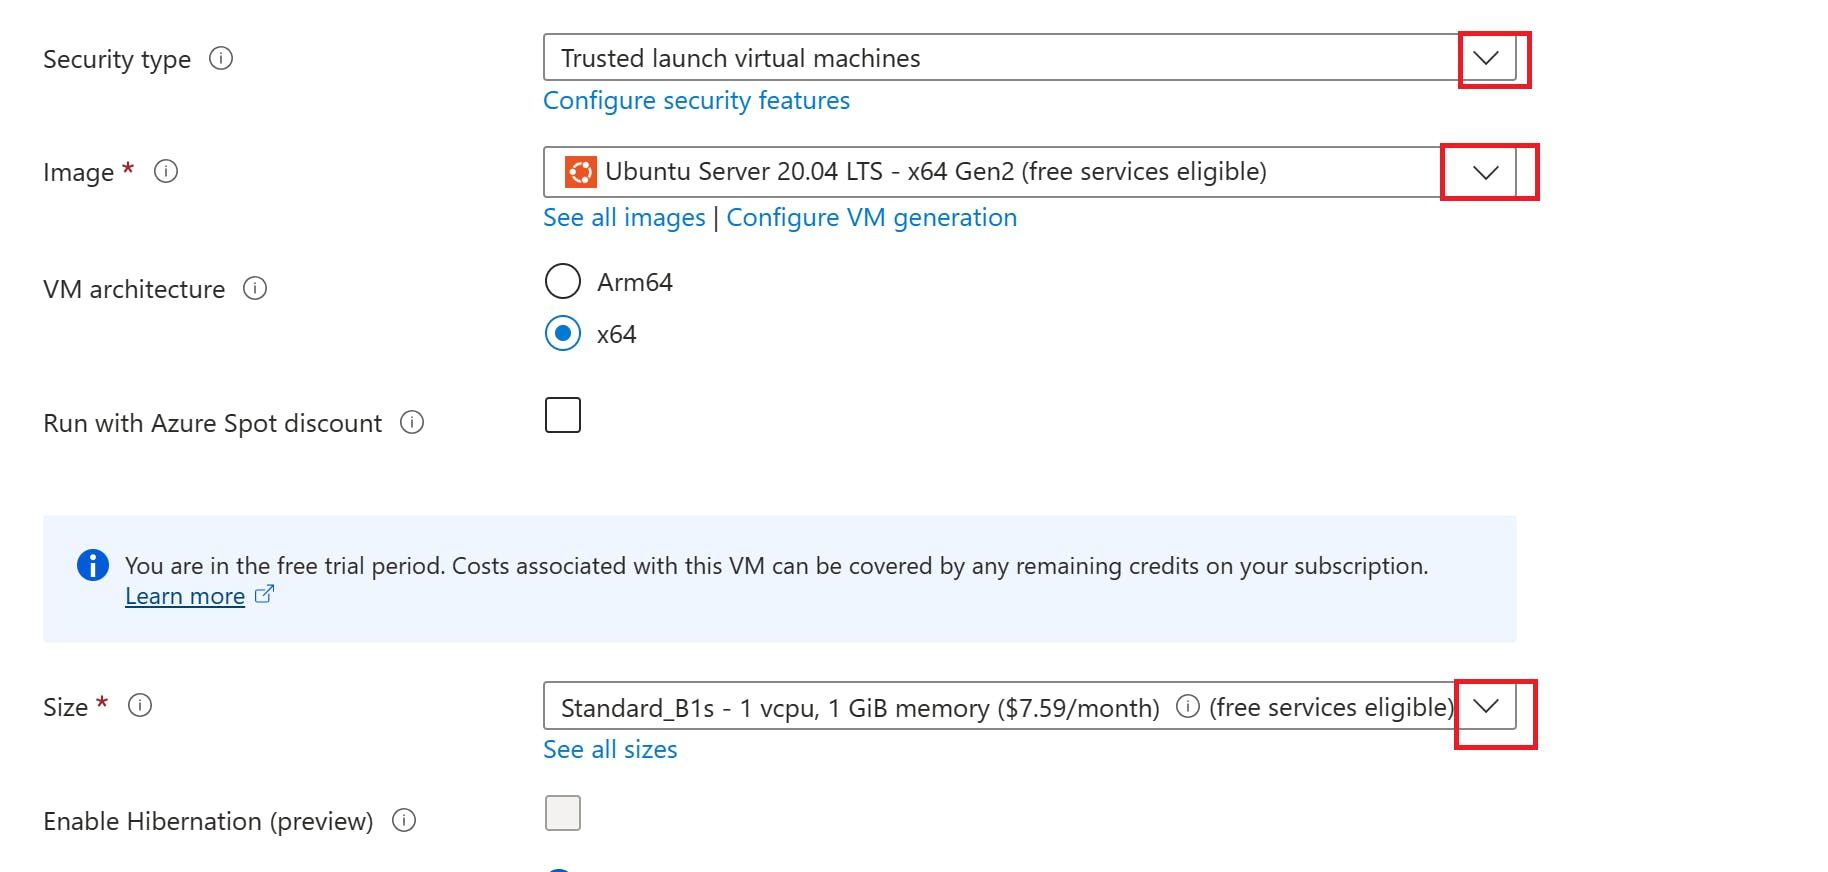
- Image section, Select any Ubuntu Server from the dropdown.
- Image in this context is an operating system. It's the infrastructural design for creating Virtual Machines or Computer systems. It has the requisite instructions and configurations needed to set up a Computer with a specific operating system as well as software. Ubuntu is a Linux Operating System.
- Select the Size of your Virtual Machine form the dropdown or click on "See all Sizes" to see the full list of sizes. (Leave the other information in default).
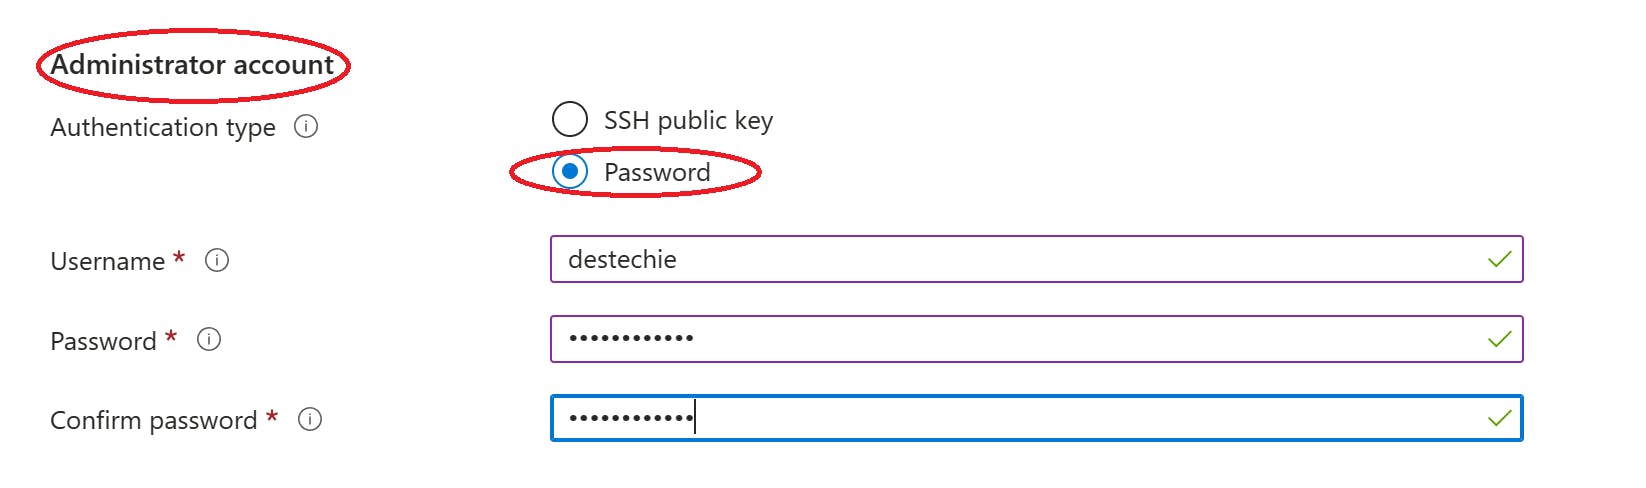
ADMINISTRATIOR ACCOUNT
- Select the password authentication type; Choose your preferred method of authentication. when choosing password, it is very important to remember your username and password. Your password must contain uppercase letters, lowercase letters, numbers and must be 12 characters long. Password-based authentication involves using a username and secret password to access the operating system.
While SSH public key authentication relies on key pairs and cryptographic algorithms for secure remote access. Public key authentication offers stronger security and protection against various attacks, making it a preferred choice for secure remote connections. However we will be using a Password for this article.
- Give your account a Username and a Password
INBOUND PORT RULES
Under the Inbound Port Rules section,
Select "Allow selected Ports" and
then select "SSH (22)" from the dropdown list under Select inbound ports. This port will give you remote access to your Linux VM.
Click on the small box under licensing, and then click on "Next:Disks\>"

DISK
Under OS disk type, select "Standard SSD" or any other disk type you want as shown below. Leave all other columns in default.
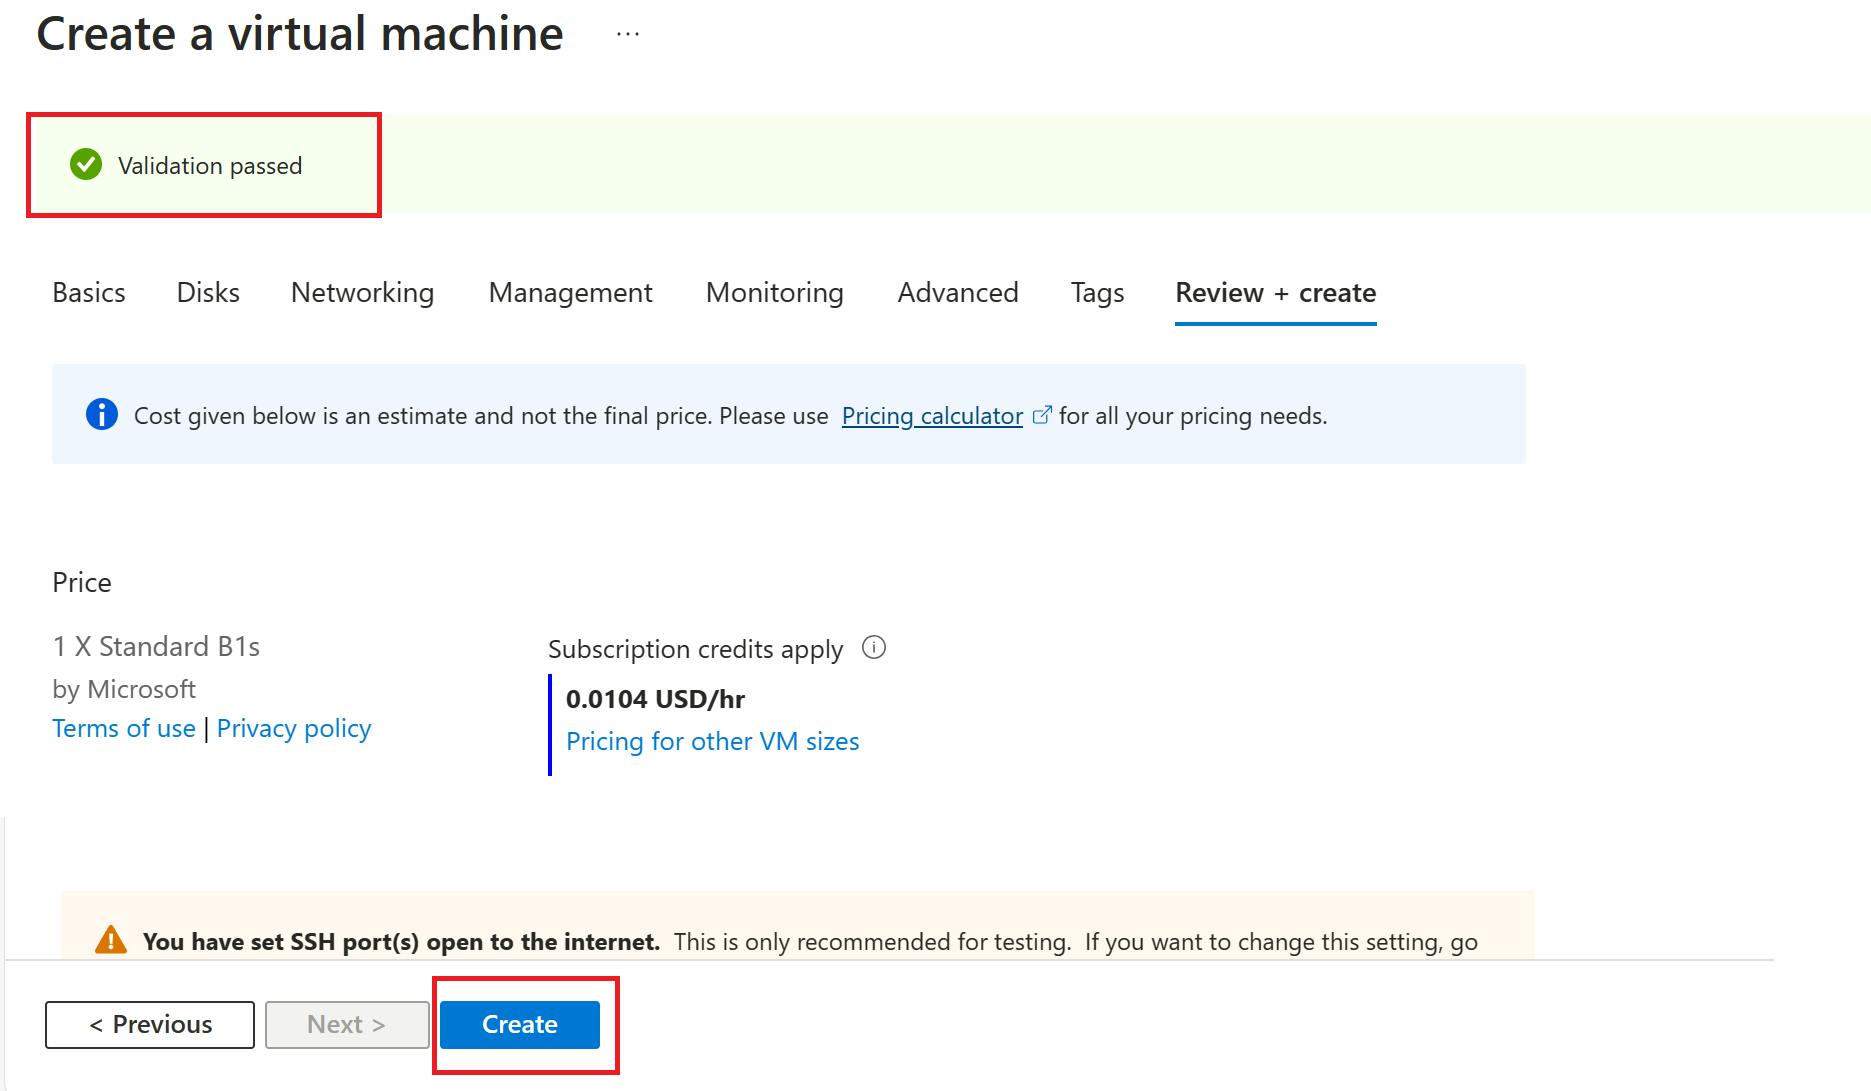
Skip and Leave these pages in default; Networking, Management, Monitoring, Advanced, Tag and click on "Review+Create".

Review the summary of your virtual machine configuration and click on the "Create" button to begin the deployment process.
Once deployment is complete, Click on "Go to resource".

CONNECTING TO THE LINUX VIRTUAL MACHINE
At this point the Linux virtual machine has been created and ready for use, in order to connect to the Linux virtual machine, we will be using the SSH command key;
- Copy the Linux virtual machine IP address.

- Open PowerShell on your Laptop and input the following command " ssh '', give space and input your username you chose while creating the Linux VM, with an @ key input your IP address and Press enter. example: ssh destechie@20.81.239.212 as showed below;

- then press "enter" , it will request for password input the password you used when creating the Linux VM.

as seen above after inputting the right password i used when creating the Linux VM, i have been able to gain access to my Linux VM (virtual machine).
How To Disassociate IP Address
in order optimize or save cost, you can disassociate your IP address from your virtual machine, the steps below will guide you:
Click on your IP address.
On the overview page, click on dissociate at the top as show below;

- It will ask you to confirm dissociation, click "Yes'. Once you click yes, your IP address will be dissociated from your Virtual Machine.

How To Associate IP Address
To associate your IP, simply click on the Associate button.
A page will open up, choose the Resource type as Network interface, and select your resource group under the network interface and click on OK.
Your IP will be associated back to your virtual machine

Thank you for reading....